|
aremgy
|
 |
« on: May 20, 2010, 09:45:59 am » |
|
ROCK STAR

This tut was written on Sept. 29, 2009.
It is written using PSP9; I'm the same effects are available in other versions.
SUPPLIES
A tube and a closeup (or an image).
I'm using the work of Ismael Rac. You need to purchase a license to use this tube from AMI.
The following filters:
Mehdi, Sorting Tiles (available HERE)
Greg's Factory Output, Pool Shadow
Two fonts of your choice, I'm using "Shoebop" and "Impact"
Let's start with your tube.
Resize it to 300 pixels in height.
Adjust-Sharpness-Sharpen, if necessary.
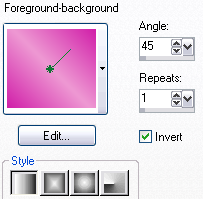
Pick a darker color as your background, and a lighter color as your foreground.
Make a gradient with these settings:
Open a new image, 600x250.
Floodfill with the gradient.
Duplicate this layer.
Hide the top layer, we'll work on the bottom layer first.
Highlight the bottom layer.
Adjust - Add/Remove Noise - Add Noise with these settings: Uniform, 12, Monochrome checked.
Greg's Factory Output - Pool Shadow (default setting, change Intensity to 50).
Add your closeup (or image, if you choose).
Move it to the far right.
Change the layer mode to Luminance (Legacy), and the opacity to 36.
Unhide and highlight the top layer.
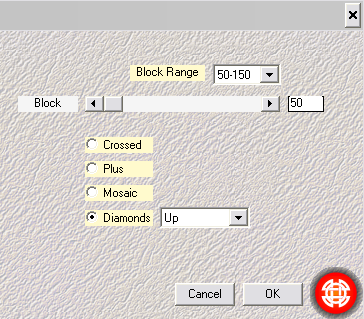
Mehdi-Sorting Tiles with the following settings:
Effects-Edge Effects-Enhance
Change the opacity of this layer to 65.
Add the tube that was resized earlier.
Move it to the left, positioning it where you think it looks best
Add a blurry drop shadow (I used 5, 5, 100, 50, black).
Now the word art!
Close off your gradient, you're using just the darker background color.
Use the font, "Impact", size 48, create as vector.
Type out your phrase (I'm using the phrase, "ROCK STAR").
Use the "handles" of the vector to stretch the phrase out and add height.
Use your judgment as to what looks best.
You can, if you wish, move this layer below the smaller tube to make the word art larger.
When it is in place, convert the vector layer to a raster layer and duplicate.
Change the layer mode of the bottom word art layer to Soft Light.
Change the layer mode of the top word art layer to Multiply and the opacity to around 18.
Add a sharp drop shadow to the bottom word art layer (I used 1, 1, 100, 1, black).
Change your foreground color to black and Swap Materials (so your background color is black, and your foreground color is your darker color).
Highlight the top word art layer.
Using the font, "Shoebop" (or the font of your choice), size 48, add the rest of your word art.
(I'm adding the phrase "I wanna be ...")
Again, use the "handles" of the vector to lengthen the phrase a bit.
Use your judgment.
No drop shadow!
Highlight your top tube layer.
Add a new layer.
Select All.
Selections-Modify-Select Selection Borders (use Inside, 2, Anti-alias UNCHECKED).
Fill this selection with your darker color.
Add the following drop shadows:
2, 2, 58, 3, black and -2, -2, 58, 3, black
Add your copyright information.
Add your name using the font of choice.
No drop shadow!
The tag is done, now for the avatar!
Make a copy of your tag (Shift + D)
Hide all layers above the Mehdi layer.
Crop to 150 x 150, using the Width and Height boxes in the Crop toolbar and moving the crop selection to where you think it looks best.
Click the checkmark.
Add a new layer, and repeat the selection border and drop shadow.
Add your copyright information and your name/initial.
You are done! |

