|
aremgy
|
 |
« on: January 27, 2012, 05:28:05 pm » |
|
F R A M E D

This tut was written on January 27, 2012.
It is written using PSPX; I'm sure the same effects are available in other versions.
SUPPLIES
A tube; one that is taller than wide will work best.
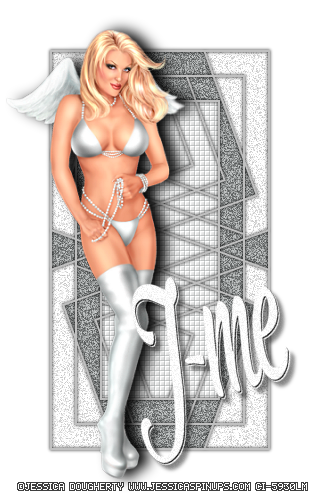
I'm using the work of Jessica Daugherty, formerly signed with CILM.
A license and tubes for this artist may be purchased from CDO.
No outside filters!
Font of choice (I used "Cider Script").
Set your background color to this light gray: #c0c0c0. Set your foreground to a medium to dark color from your tube.
This tut shows how to make a tag using no scrapkits and no templates.
We'll start with your tube; we need to resize it.
Duplicate the tube by holding down Shift + D at the same time.
Repeat so two copies of the tube; then close down the original tube.
On one of the copies, Image - Resize to 400 pixels high.
Make sure that the Lock Aspect Ratio box is checked.
Adjust - Sharpness - Sharpen.
Set this aside for a bit.
On the other copy of the tube, Image - Resize to 300 pixels high.
There is no need to Sharpen this tube; instead hit DELETE.
We are going to build the tag on this image.
Selections - Modify - Select Selections Border using Inside, 2, Anti-alias unchecked.
Floodfill the selection with the gray background color.
Selections - Select None.
Image - Canvas Size; we are going to add a space of 25 to all four sides.
To do that, add 50 to both of the original dimensions.
Add 50 to each of the number in the Original Dimensions box and put the new numbers in the New Dimensions box.
Make sure the centered button is pushed in the lower left corner of the window.
If you do it correctly, all four box in the lower right corner of the window will say 25.
The height of the image should now be 350 pixels.
The width will vary depending on the size of the original tube.
Repeat the same 2px Selection border.
Image - Canvas Size by another 50 pixels.
The height of the image should now be 400 pixels.
The width will vary depending on the size of the original tube.
Repeat the Selection border.
This time, increase the canvas size by 100 pixels.
The height of the image should now be 500 pixels.
The width will vary depending on the size of the original tube.
Layers - Merge - Merge Visible.
The frame is done; throughout this tut, I will be referring to this as the frame layer.
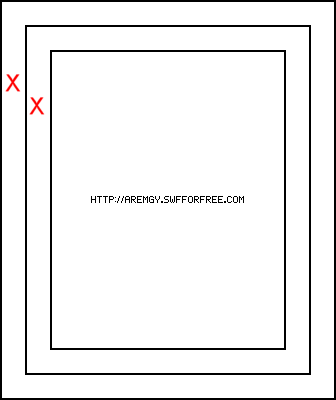
Using your Magic Wand, click in the spaces between the thin lines of the frame layer.
Click in the general area of the two red "X"s shown below:
(For this screenshot, I've added a white layer below the frame and I made the frame using black)
Add a new layer BELOW the frame layer.
Highlight the new layer, and floodfill the selection with your chosen color.
Selections - Select None.
Hide this layer for now; this layer will be referred to as the color layer.
Highlight the frame layer and duplicate it.
Hide the duplicate for now, work with the original.
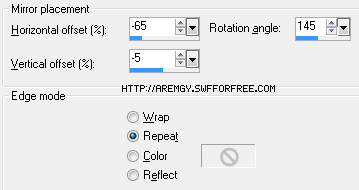
Effects - Reflection Effects - Rotating Mirror using the following setting:
Duplicate this layer; then Image - Flip and Image - Mirror.
Layers - Merge - Merge Down.
Duplicate this merged layer, then Image - Flip one more time.
Unhide the top layer.
Layers - Merge - Merge Visible.
This layer will continue to be called the frame layer.
Using the Magic Wand, click on the OUTSIDE of the frame layer.
Selections - Modify - Expand by 1.
Add a new layer; floodfill with white.
Selections - Select None.
Duplicate the white layer.
On the top white layer, Effects - Texture Effects - Blinds using the following setting:
(Change the color in the box to match your chosen color.)
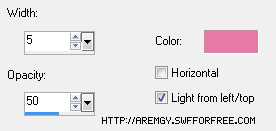
Repeat the Blinds effect; click the box in front of Horizontal.
Effects - Edge Effects - Enhance.
Change the opacity of this layer to 50.
Layers - Merge - Merge Down.
Layers - Arrange - Send to Bottom.
There should be three layers, starting from the bottom:
The background layer you just created.
The color layer.
The frame layer, at the top.
Highlight the frame layer.
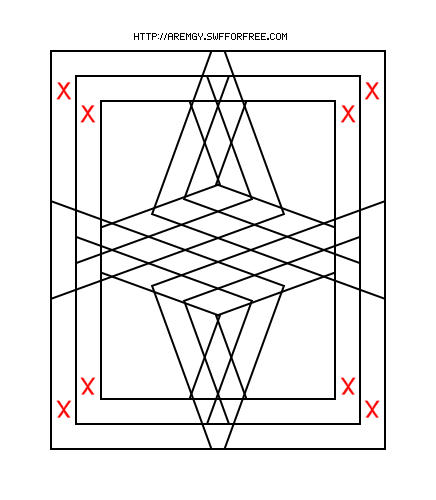
Using the Magic Wand (set to Add (Shift)), click in the spaces shown by the red "X"s:
(Depending on the size of the tube, the lines on the frame layer may look different,
but there should be eight corner sections in this basic shape.)
Selections - Modify - Expand by 1.
Highlight the color layer.
Floodfill the selection with white.
Selections - Select None.
Highlight the color layer (that was just filled with white).
Adjust - Add/Remove Noise - Add Noise using Uniform, 45, Monochrome checked.
Make sure all three layers are unhidden.
Highlight the frame layer.
Effects - 3D Effects - Drop Shadow set to 0, 0, 100, 5, black.
Add the tube that was set aside earlier.
Effects - 3D Effects - Drop Shadow set to 0, 10, 100, 20, black.
There is some leeway to moving the tube, just be careful about moving too close to the edge of your image.
Otherwise, you'll have a sharp edge on your finished tag.
Add your name and all necessary copyright information.
Save as a .png file.
Here is another example, also using the work of Jessica Daugherty:
|
|
|
|
|
|


|
|
|
|

