|
aremgy
|
 |
« on: January 08, 2012, 02:10:57 pm » |
|
O V E R L A Y
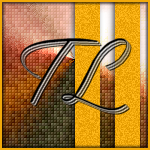
This tut was written on January 8, 2012.
It is written using PSPX; I'm sure the same effects are available in other versions.
SUPPLIES
A tube.
I'm using the work of Jessica Dougherty.
This tube was purchased while this artist was at CILM.
She is currently represented by CDO.
The following filters:
MuRa's Meister - Copies
Unplugged Effects - Disco Lights and Laserrays
Xero - Fritallary
Font of choice (I'm using "Valentina")
Let's begin!
Pick a minor color from your tube as your background.
Open a new image, 600 wide x 250 high.
Add your tube, moving it into position.
You may, if you wish, crop to 600x250 to keep things centered.
Duplicate your tube.
Hide the top tube layer for now.
On the bottom layer, MuRa's Meister - Copies using the Line preset (changing the number to 15.)
You may have to increase the number to ensure that the entire layer is completely covered.
Adjust - Blur - Gaussian Blur; Radius = 10.
Duplicate this layer.
On the top layer, UnPlugged Effects - Disco Lights using the default setting (0, 128, 0).
Adjust - Hue & Saturation - Colorize using both boxes at 0.
Change the setting of this layer to Overlay.
Hide this layer for now.
On the bottom layer, UnPlugged Effects - Laserrays using the default setting (64).
You may find that changing this number makes for more distinct color variations.
Effects - Edge Effects - Enhance.
Xero - Fritallary using 3, 30, 10, 10.
Highlight the Overlay layer.
Add a new raster layer.
Selections Tool - Custom Selection using the following setting:
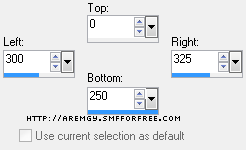
Fill the selection with your chosen color.
Selections - Select None.
Repeat the MuRa's Meister - Copies (with the line setting at 15.)
Selections Tool - Custom Selection using the following setting:

DELETE
Selections - Select None.
Adjust - Add/Remove Noise - Add Noise; Uniform, 15, Monochrome checked.
Effects - 3D Effects - Drop Shadow using -2, -2, 65, 8, Black.
Unhide your tube layer
Add a blurry drop shadow (I used Eye Candy 5: Impact - Perspective Shadow using the Blurry preset.)
Add a 2px Selection border with the same color you used earlier.
(I've added a sharp drop shadow (1, 1, 100, 1, black and -1, -1, 100, 1, black.)
Add your name and all necessary copyright information.
You may also wish to add any word art.
To animate:
Hide the Overlay layer.
Edit - Copy Merged.
In AS, right click on your workspace.
Paste As New Animation.
Back in PSP, unhide the Overlay layer.
Edit- Copy Merged.
In AS, Edit - Paste - After Current Frame.
Change the frame properties of both layers to 45.
For the avatar:
Duplicate your tag (Shift + D.)
Remove all unnecessary layers.
Crop to 150x150.
Add a new layer.
Add a 2px Selection border, using your dark color.
Add your name (or initial) and all necessary copyright information.
You may animate the avatar, if you wish.
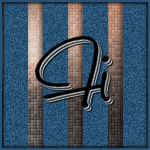
Here is another example, using the work of Keith Garvey.
This work was purchased from PTE.
|
|
|
|
« Last Edit: January 08, 2012, 04:13:23 pm by aremgy »
|
Report Spam
 Logged
|
|
|
|
|


|
|
|
|

