|
aremgy
|
 |
« on: January 23, 2012, 06:12:51 pm » |
|
D A R W I N

This tut was written on January 23, 2012.
It is written using PSPX; I'm sure the same effects are available in other versions.
SUPPLIES
A tube and a closeup.
I'm using the work of Keith Garvey.
This tube was purchased from MPT.
A license and tubes for this artist may be purchased from PTE.
The following filters:
Simple - Diamonds
Toadies - Darwin
Xero - Fritallary
Graphics Plus - Cross Shadow
Font of choice (I'm using "Almond Script")
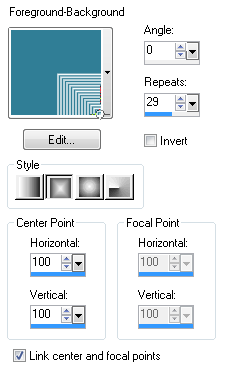
Set your foreground color to a darker color from your tube; set your background color to white.
Make a foreground gradient with the following settings:
This tut is a little different from other tuts I've written.
I'm going to show you how to make a tag first, then I'll show you how to turn that tag into a forum set.
Open a new image, 600 wide x 600 high.
Floodfill with your gradient.
Selections Tool - Custom Selection using the following setting:
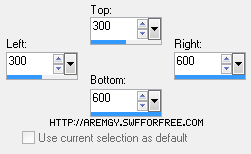
Selections - Invert.
DELETE.
Selections - Select None.
Duplicate this layer; Image - Flip.
Layers - Merge - Merge Visible.
Duplicate this layer; Image - Mirror.
Layers - Merge - Merge Visible.
Duplicate this layer.
On the top layer, Simple - Diamonds.
On the top layer, Toadies - Darwin.
Effects - 3D Effects - Drop Shadow using 0, 0, 100, 10, Black.
On the bottom layer, Toadies - Darwin.
Effects - Edge Effects - Enhance.
Change the opacity of this layer to 35.
Layers - Merge - Merge Visible.
Set this image aside for a bit.
Open a new image 600 pixels wide x 400 pixels high.
Floodfill with black.
Xero - Fritallary using 3, 30, 10, 10.
Effects - Edge Effects - Enhance.
Graphics Plus - Cross Shadow using the default setting.
Add, as a new layer, the 600x600 image you created earlier.
(This always puts a new layer in the exact center.)
Selection Tool - Custom Selection using the following setting:
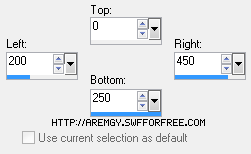
(The bottom number should be 400...thanks, Miss Shirley!)
DELETE.
Selections - Select Selection Borders using Both Sides, 1, Anti-alias unchecked.
Add a new layer and floodfill the selection with your darker color.
Selections - Select None.
Using your magic wand, click into the middle of the border selection you just made.
Selections - Modify - Expand by 1.
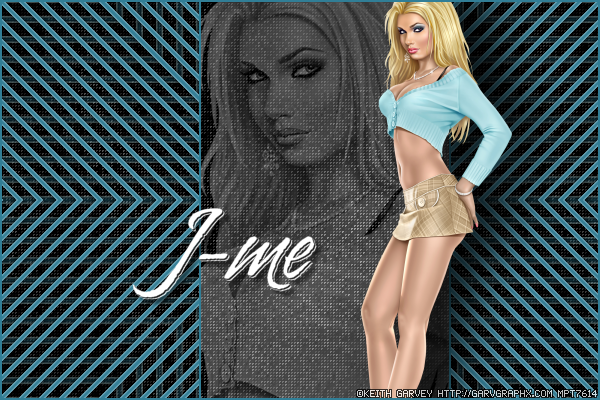
Add your closeup (or image) as a new layer.
Selections - Invert.
DELETE.
Selections - Select None.
Move this layer directly above your black background layer.
Change the setting of this layer to Luminance (legacy); change the opacity to 35.
(If you are using an image, omit this step.)
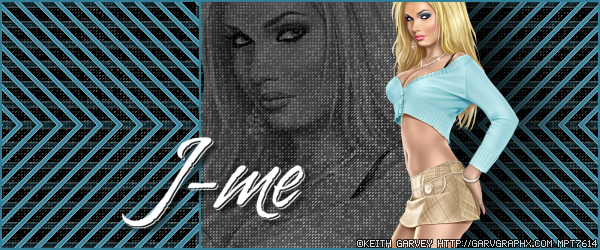
Add your tube, moving into position.
Add a blurry drop shadow (I used Eye Candy 5 - Perspective Shadow).
Add a 2px Selection border, using your darker color.
Add your name and all necessary copyright information.
Your tag is done; if you want to make a forum set, continue with these instructions:
Make a copy of your 600x400 - Shift + D.
Selection Tool - Custom Selection using the following setting:
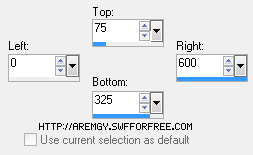
You'll need to move your closeup, your tube (or your image) down a bit so it will fit correctly between the marching ants.
When you are happy with the position, Image - Crop to Selection.
(You can simply crop the duplicate tag to 600x250, but the Darwin element will not be centered.)
Selections - Select None.
Add your 2px Selection Border, using your chosen color.
Add your name and all necessary copyright information.
For the avatar:
Duplicate your tag (Shift + D.)
Remove all unnecessary layers.
Crop to 150x150.
Add a new layer.
Add a 2px Selection border, using your chosen color.
Add your name (or initial) and all necessary copyright information.
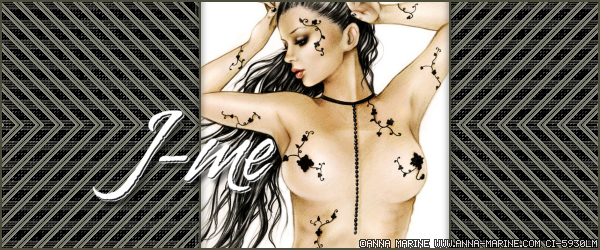
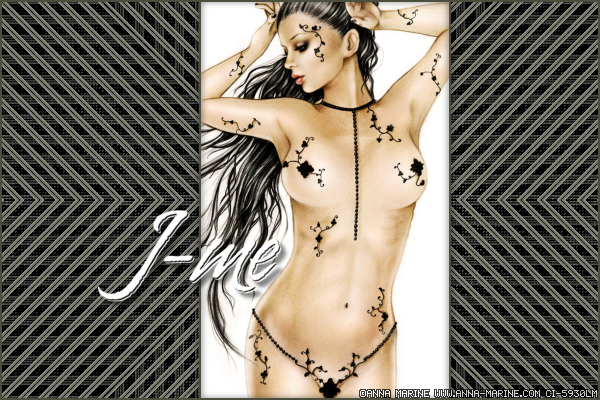
Here is another example, using a beautiful image by Anna Marine:

|
|
|
|
« Last Edit: January 23, 2012, 08:26:57 pm by aremgy »
|
Report Spam
 Logged
|
|
|
|
|


|
|
|
|

