|
aremgy
|
 |
« on: May 20, 2010, 09:52:08 am » |
|
W I R E D


This tut was written on May 3, 2010.
It is written using PSPX; I'm NOT sure the same effects are available in other versions.
SUPPLIES
A tube.
I'm using the work of Ismael Rac. You need to purchase a license to use this work from AMI.
The following filters:
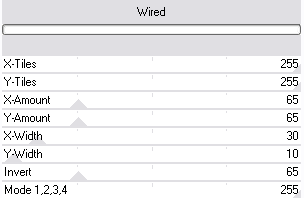
VM Instant Art - Wired
Greg's Factory Output Vol. II - Pool Shadow
Font of choice (I'm using "Escoffier Capitaux")
Let's begin!
Pick a color to be the glittery background.
Open a new image, 600x600.
VM Instant Art - Wired with the following setting:
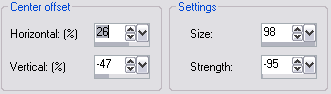
Effects, Distortion Effects, Warp with the following setting:
Selection Tool, Custom Selection with the following setting:

Crop Tool, Snap crop rectangle to Current Selection, then click on the checkmark on the left side:
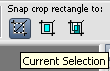
(Snap crop can be found on the crop toolbar to the far right side.)
Magic Wand, with these settings: Add (Shift), RGB Value, Tolerance 10, contiguous, Feather 0)
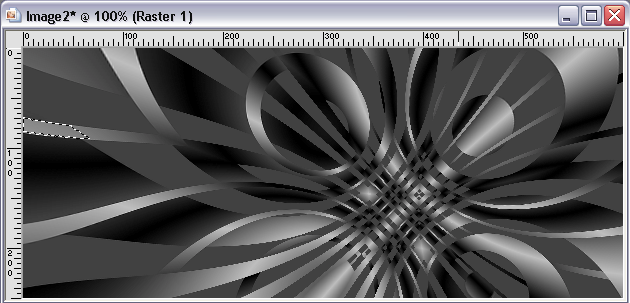
Click on this part of your image:
Selections - Modify - Select Color Range with the following setting:
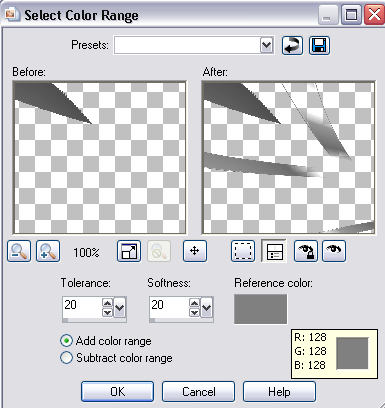
DELETE
Add a small drop shadow.
(I used 5, 5, 50, 5, black.)
If this effect doesn't work for you (like I said, I'm not sure whether this will work with other versions), I've attached this layer at the bottom of the tut.
Add a new layer.
Floodfill with your chosen color.
Greg's Factory Output Vol. II - Pool Shadow with the default setting.
Duplicate twice, for three layers total.
On the top layer, Add noise - Uniform, 90
On the 2d layer, Add noise - Uniform, 95
On the 3d layer, Add noise - Uniform, 100
Bring your Wired layer to the top.
(Layers - Arrange - Bring to top.)
Add your tube, positioning where you think is best.
Add the same drop shadow you used earlier.
Add a 2 pixel selection border.
(Selections, Select All.
Selections, Modify, Select Selection Borders - Inside, 2, anti-alias checked.
Fill with your chosen color.)
Add your name and all necessary copyright information.
Animate as usual.
For the avatar:
Duplicate your tag in PSP.
Remove the tube layer.
Crop to 150x150.
Add your 2 pixel selections border.
Add your name (or initial.)
Here is another example, also using the work of Ismael Rac (I flipped the Wired layer):


|
|
|
|
|
|


|
|
|
|
aremgy
|
|
« Reply #2 on: June 05, 2010, 11:01:45 am » |
|
great job, Jen!
glad you liked the tut....
|
|
|
|
|
|
|
|
|
|

