|
aremgy
|
 |
« on: March 25, 2011, 02:25:12 pm » |
|
C O M B O

This tut was written on March 25, 2011.
It is written using PSPX; I'm sure the same effects are available in other versions.
SUPPLIES
A tube.
I'm using the work of Myka Jelina.
This tube was purchased when this artist was with CILM.
You may purchase a license to use this work at her store HERE.
The following filters:
MuRa's Meister - Copies
Toadies - What Are You?
Font of choice (I'm using "Hupp Antiqua")
Let's begin!
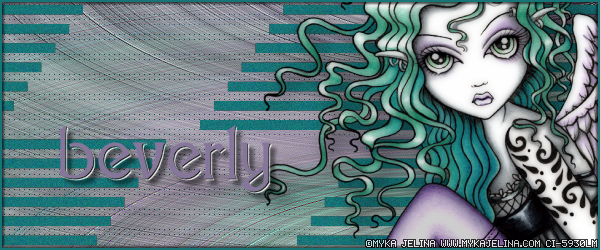
Open a new image, 600x250
Paste your tube as a new layer.
MuRa's Meister - Copies using the Wall Paper (rotate) preset.
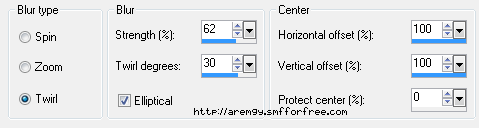
Adjust - Blur - Radial Blur using the following setting:
Effects - Edge Effects - Enhance 2x.
Duplicate this layer.
Image - Flip.
Change the layer setting of the top layer to Luminance (not Legacy); change the opacity to 63.
Layers - Merge - Merge Visible.
Add a new layer.
Selection Tool - Custom Selection using the following setting:
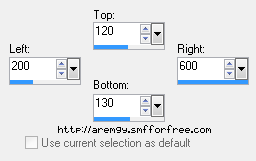
Fill the selection with white.
Selections - Select None.
MuRa's Meister - Copies using the Duplicate preset and the following setting:
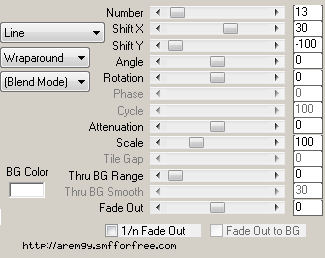
Duplicate this layer.
On the bottom layer, Toadies - What Are You? using the default setting.
Effects - Texture Effects - Weave using 1, 4, 1, both boxes filled with black.
Image - Mirror.
Change the layer setting of this layer to Multiply.
On the top white layer, Selections - Select All.
Selections - Float.
Selections - Defloat.
Pick a color from your tube.
Add a new layer, fill the selection with your color.
Selections - Select None.
Adjust - Add/Remove Noise - Uniform, 12, Monochrome unchecked.
Effects - 3D Effects - Drop Shadow using 0, 0, 50, 5, black.
Highlight the white lines layer (directly under the layer you just finished).
DELETE.
This prevents any of the white showing through on your finished tag.
Add your tube and a blurry drop shadow (I used Eye Candy 5 Impact - Perspective Shadow).
Add a new layer.
Add a 2px Selection border, using your dark color.
Add your name and all necessary copyright information.
For the avatar:
Duplicate your tag (Shift + D.)
Remove all necessary layers.
Crop to 150x150.
Add a new layer.
Add a 2px Selection border, using your dark color.
Add your name (or initial) and all necessary copyright information.
Here is another example, using the work of Olivia:


|
|
|
|
« Last Edit: July 11, 2011, 11:02:42 am by aremgy »
|
Report Spam
 Logged
|
|
|
|
|


|
Araceli
Newbie

Posts: 20

|
|
« Reply #1 on: April 16, 2011, 05:04:13 pm » |
|
I love this tuts!   |
|
|
|
|
|
|
|

